It took me a long time to finish this week's spread, and a long time to put together this post. But I did want to share it because I am really proud of getting it done. I included about 286 pictures in this week. I have multiple inserts, because it was our vacation week (my mom came to visit and we went on a road trip) and I wanted to document it all. As I walk you through the pages, I will also share a few important things I learned about how to make Project Life work for me. I used various sizes for the inserts, but all are smaller than 12 inches in width, so that at a glance you can easily see where the week ends. Here we go!
This is what the week looks like when you open the album.

I used my paper supplies for this week, because I knew I'd have many photos to print and didn't want to have to print more things. Plus, it's good to use up the paper goodies I seem to be hoarding lately! ;) I used mostly the Dear Lizzy Neapolitan line by American Crafts. I stamped the dates with the K&Company Smash Stamp and added a day of the week sticker from the Project Life Clementine kit (I've never used them before, but they are really cute, and the pink matched my color scheme perfectly!).

I wrote directly on my photos using the American Crafts Slick Writer, Fine Point, Black - perfect to add in more journaling in the white space of the photos. The numbers twenty and 2 for the title card were cut out from the Sunny Skip paper; the background paper is by Pebbles. I love the little Tile Letter Stickers. I used a few Dear Lizzy Neapolitan Large Tags for my journaling, along with some stamping accents and embellishments. I used pink ColorBox Pigment Ink for most of my stamping this week - as you can see it is a very bright and pretty color (not at all like the preview on Amazon, which looks purple!), almost neon. I also embossed a few embellishments, such as the car wood veneer here, using VersaMark clear ink and grapefruit Zing embossing powder. For stamping, I created a few titles using the little EK Success Image Tree typewriter alphabet, and I also used a sentiment combining two stamps from one of my favorite stamp sets - the Amy Tangerine Sketchbook Clear Acrylic Stamps. I stamped the latter directly on the photo with pigment ink, and it turned out great!
Here comes the first insert. It's 6-Inch by 6-Inch Page Protector. In the front I made a collage of 16 instagram photos from DH's Apple iPhone 4S, and in the back I splattered some white card stock with three pink watercolor hues using Crayola Washable Watercolors, Ranger Tim Holtz Distress Ink and Caran d'Ache Neocolor II Pastels. Then I used my sewing machine (this isn't the same model I have, but it's pretty close - I went for the cheapest model, and it works great for sewing on paper) to create a journaling grid, and added a lovely sticker from the Dear Lizzy Neapolitan Collection - Remarks - Sticker Sheet - Borders, Accents and Phrases.

Here comes the second insert. I used the Design G Photo Pocket Pages by Becky Higgins. I actually used a bunch of these because it was all I had available when I put together this week - but I have long since expanded my stash. ;) The first pocket has a piece of Dear Lizzy Neapolitan vellum paper, layered with a clothes tag and some stickers (Dear Lizzy Neapolitan Remarks Stickers Book Accents and Phrases and Dear Lizzy Neapolitan Large Tags Embellishments). The "let the fun begin card" comes from the Cheerful Notes paper.

Turning this page, we see the back of this insert, and a peek at the following inserts.

The back of the insert has the back of the Cheerful Notes paper and of the vellum paper. I love that the highly rebated price shows up from the back of the clothing tag through the vellum - I was really proud of my $7 find! ;) I included metro tickets in a pocket. I stamped a few Martha Stewart Butterflies with distress ink on my card to make it more interesting. The card in the bottom pocket comes from the Project Life Clementine kit.
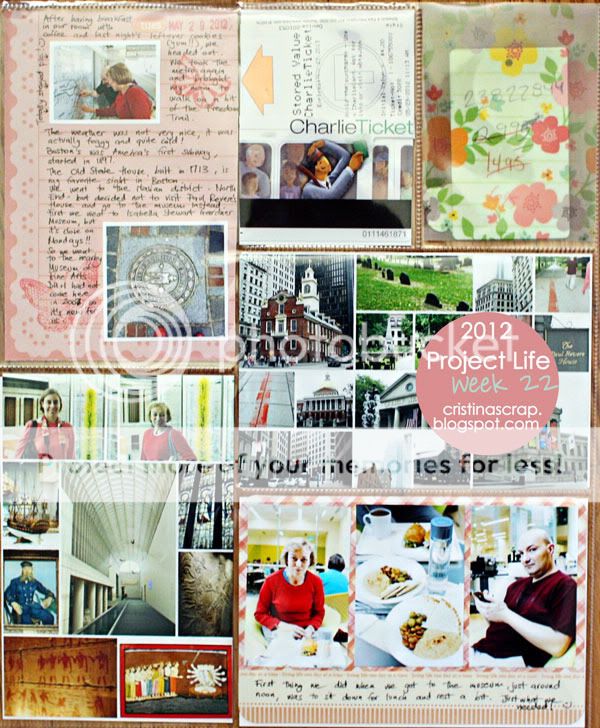
And here comes the third insert. I used a 6 x 12 page protectors, which had just the right width to hold the museum brochure. I created a collage of instagrams from DH's iPhone.
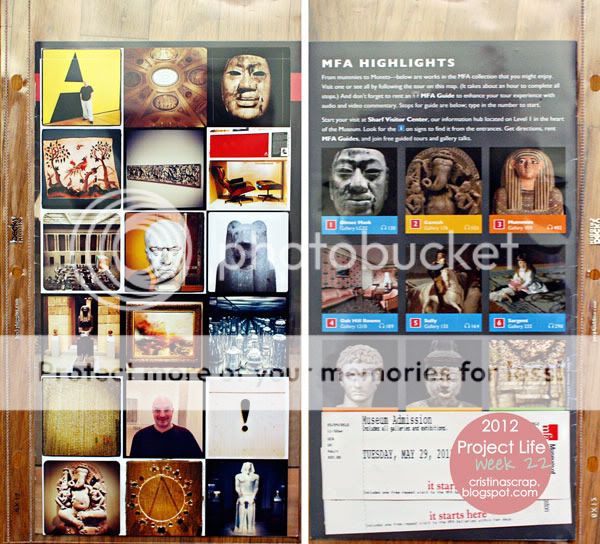
I also tucked the museum tickets in the protector. This is probably one of my favorite parts of Project Life: being able to find a place for all the memorabilia that I cannot get myself to throw out. :) OK, let's move on to insert #3. I used two journaling cards from the Project Life Clementine kit, embellished with stickers.

The bottom left pocket is a piece of a placemat - I asked for an extra at the restaurant, just to be able to add it to my album. ;) Turning page, here's what you see:

On the left, the back of insert #3, with plenty of pictures, journaling, and some business cards.

Next up, insert #4 has two of my favorite inserts ever! Both include stamping and stickers. The Amazing stamps by Ali Edwards are a small set that comes incredibly handy - and they're really cheap too! The "best ever" stamp is from a retired Studio Calico set, and I added the Tile Letter Stickers to create the title. The "better together" sticker came from the Dear Lizzy Neapolitan Remarks Stickers Book Accents and Phrases, and it originally had three pair of feet - I cut the third one out because I was referring to only 2 people. :) I think it turned out cute! The paper in the bottom right corner is from the Dear Lizzy Neapolitan 6X6 Paper Pad, which is a really pretty paper pad (the patterns are shrunk down from the 12x12 versions, and the sheets are one sided).

OK, let's turn page! On the left you can see the back of insert #4, and on the right is the front of insert 5 - once again a Design G page.

Here's a closer look to the left page. In the top left pocket, I used a leftover strip of paper from the Dear Lizzy Neapolitan 6X6 Paper Pad, and included some memorabilia, along with washi tape. In the 3"x4" pocket, I embellished a grid card with stickers and a mistable butterfly misted with Mister Huey's Color Mist - Cameo. At the bottom, I used another one of the Dear Lizzy Neapolitan Large Tags with a retired Studio Calico stamp stamped with pink ColorBox Pigment Ink.

And here's a closer look to the right page. I used some of my newer stamps on this page, the Buttercup Clear Stamps (Lily Bee Designs): it's such a cute little set! I used the chevron stamp on the journaling card on the left and on the mistable sun element, as well as the flower stamped. Both are stamped with Prima chalk inks - respectively with Coldfoot Stemens (yellow) and Old Rose. I love these little ink pads, they are so affordable! The "what a view" phrase uses an exclusive Studio Calico set, which I also used to stamp on the photo ("love this") with the red ink from the Clearsnap ColorBox Pigment Petal. For the bottom right pocket, I used the pass from the National Park and created journaling lines using the dashed line stamp from the Amy Tangerine Love Struck Stamp(one of my favorite stamp sets ever!). I also embellished it with a sticker from the Dear Lizzy Neapolitan Remarks Stickers Book Accents and Phrases.

OK, turning page once again, we can see the back of insert 5 on the left, and insert 6 on the right. Insert 6 is just a simple 8.5x11 page protector into which I stuffed some maps and brochures.

Closer look to the back of insert 5:

I used my Silhouette Electronic Cutting Tool
Next, insert 7 - I used a new Design H photo pocket page for it, and here is the front and back:

The card on the left is from the Clementine kit, while I embellished the card on the right by stamping a Tim Holtz stamp with distress ink and adding a paper strip from a paper in the Cosmo Cricket Twenty Three 6x6 paper pad. I included a clipping from a magazine in the bottom pocket. OK.. we're nearing the end! Here is what you see when you turn insert 7: you see the final page, which is a Design A photo pocket page.

Here's a close up. The backgrounds are white card stock with stamps from TPC Studio Let's Eat, Buttercup Clear Stamps (Lily Bee Designs, and Dear Lizzy Neapolitan Camera Clear Acrylic Stamp.

For the photo collages throughout this page, I used many of the awesome templates by Designs by Lily at The Lilypad: 4x6 Photo Collages, 4x6 Photo Collages no. 2, Photo Collages no. 3, 6" Photo Strips
Phew! Thanks for staying until the end! ;) What do you think? Leave me a comment if you made it this far! :)


No comments:
Post a Comment